1. Overview
A Security Group is a core platform feature used for network access control. It allows you to precisely manage inbound and outbound traffic for cloud resources, helping you build secure and flexible network access policies and effectively prevent unauthorized network access, so your services can run stably.
2. Security Group Notes
After a cloud server is provisioned, a Security Group is automatically created and associated with it.
By default, the system opens:
-
remote login ports
-
ICMP
This means you can directly log in and operate the server using tools such as SSH or Remote Desktop.
If you need to use ports other than the default ones later, you must complete both of the following configurations:
-
open the port inside the cloud server operating system
-
add the corresponding allow rule in the Security Group
A typical example is after installing BT Panel. In addition to completing the panel deployment itself, you must also promptly add inbound rules in the Security Group to open the required service ports, such as 8888, 80, and 443. Otherwise, the panel will not be accessible.
By default, each region has only one Security Group, and all cloud servers in that region are associated with it. No matter how many cloud servers you provision in that region, they will use the same default Security Group.
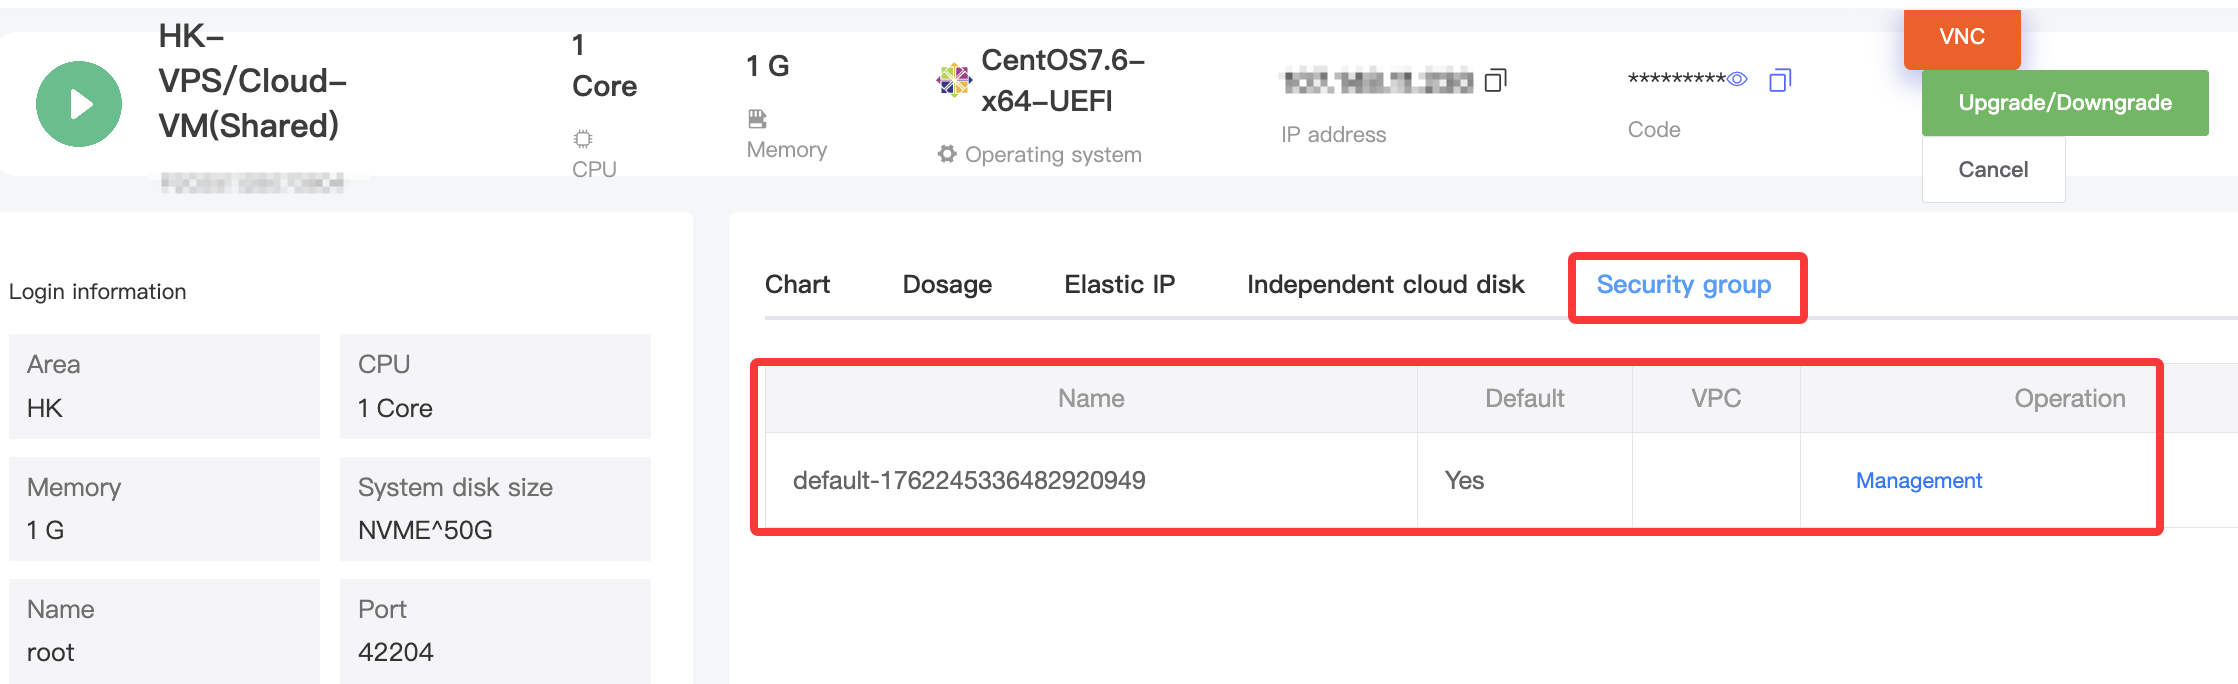
How to View a Security Group
Navigate to:
My Products → VPS
(For Bare Metal Cloud, check under “Manage Product” → “Additional Functions”)
Enter the server “Manage Product” page.
Select “Security Group” to view the Security Group associated with that server.
3. Creating Security Groups & Adding Rules
1. Access Path
Navigate to:
My Products → VPS → Security Group
On the left sidebar, you can switch between Security Group lists for different regions, such as SV2 and TY2.
2. Security Group Management
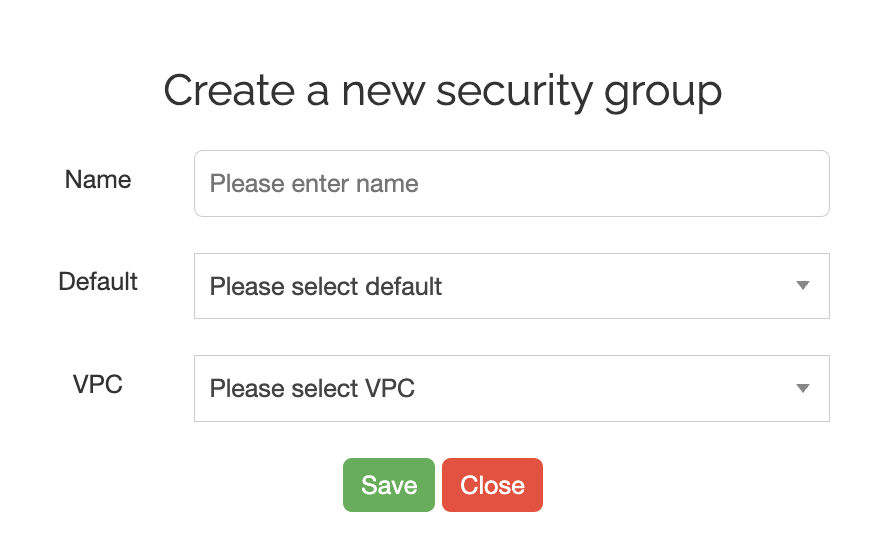
(1) Create a Security Group
Click the “Add” button in the Security Group management page. A “Create New Security Group” window will pop up. Fill in the following:
Name
Enter a name for the Security Group so you can identify different groups easily. It is recommended to name it based on the business scenario for easier management.
Default
Use the dropdown list to select “Yes” or “No” to define whether this Security Group is the default one.
If it is set as the default Security Group, it will automatically replace the Security Group associated with all servers in that region.
After completing the fields, click “Save” to create it. The new Security Group will then appear in the list. If you want to cancel, click “Close”.
(2) Edit a Security Group
Find the target Security Group in the list, then click “Edit” in the Operation column.
You can modify the Security Group name and default status. Save the changes for them to take effect.
(3) Delete a Security Group
Make sure the Security Group is not associated with any resources, otherwise deletion will fail.
Then click “Delete” in the Operation column for the target Security Group. After confirming, the Security Group will be deleted.
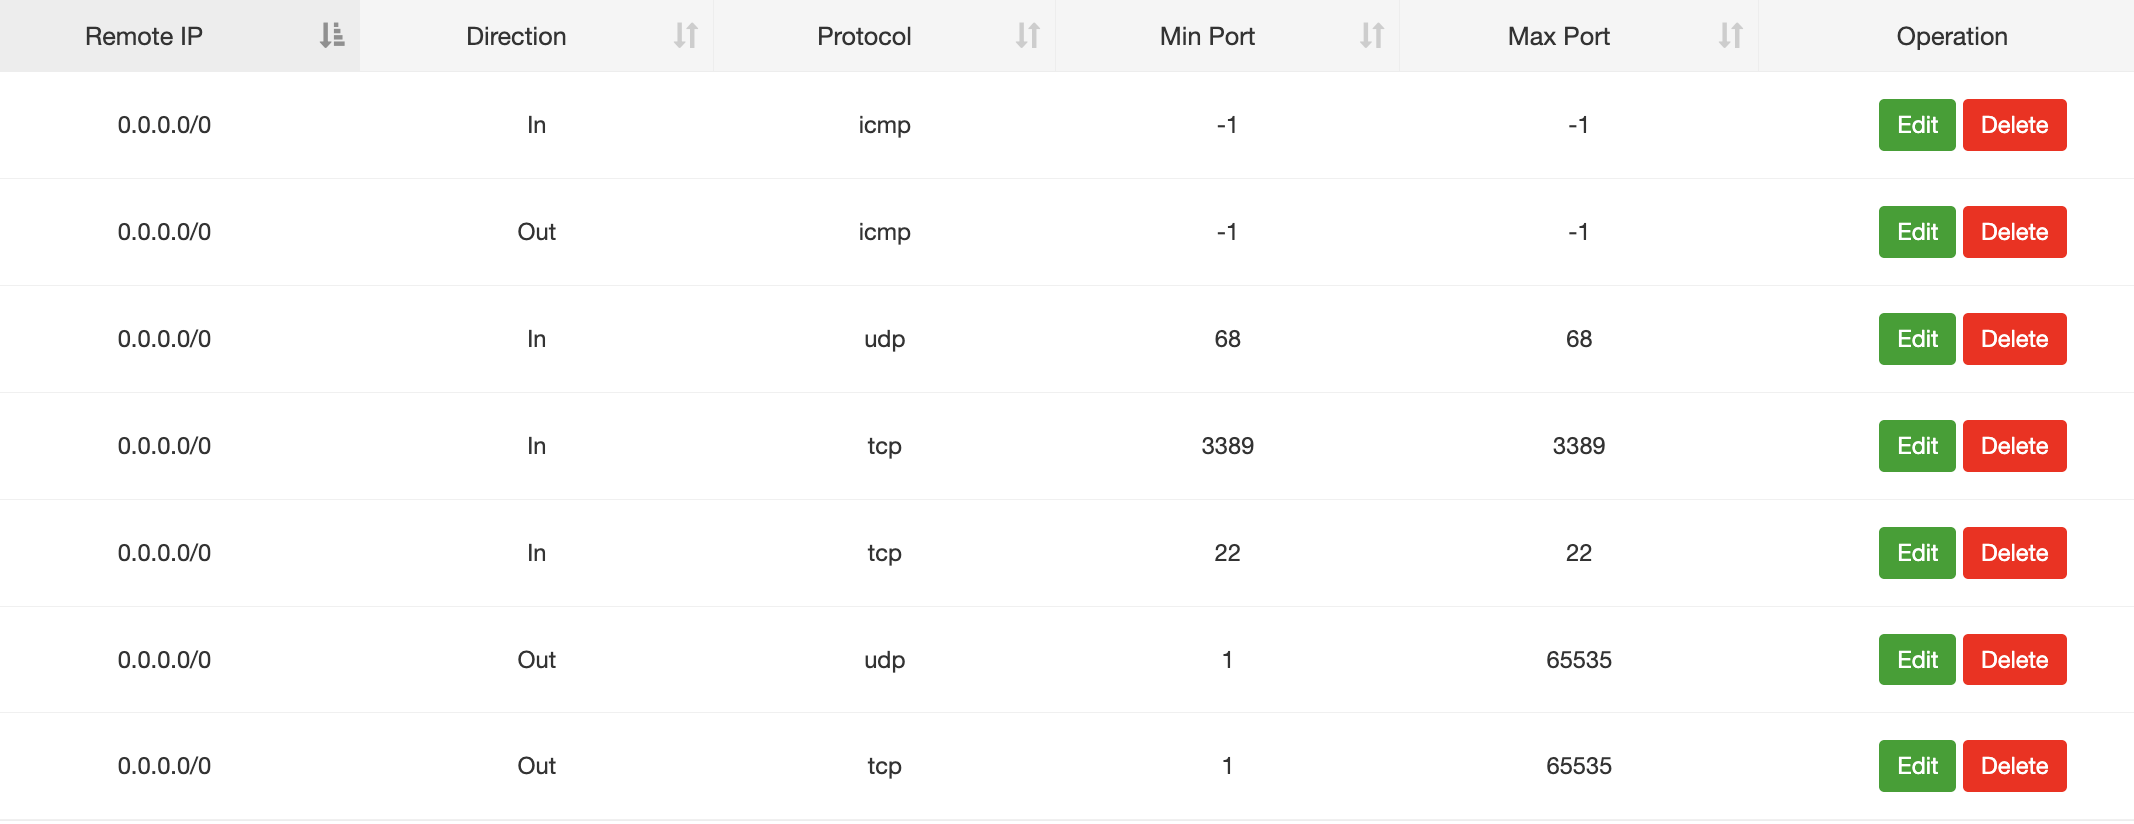
3. Security Rule Configuration
Security rules are the core part of a Security Group. They are used to define allow or deny policies for network access.
Click the name of the target Security Group in the list to enter the “Security Group Rules” management page, where you can add, edit, or delete rules.
(1) Add a Security Rule
Click the “Add” button. A “Create New Security Rule” window will pop up. Configure the following parameters:
Remote IP
Enter the remote IP address or IP range to allow or deny. It supports a single IP, such as 192.168.1.100, or a CIDR range, such as 0.0.0.0/0, which means all IP addresses. This allows you to precisely control the traffic source.
Direction
Select “Inbound” or “Outbound” from the dropdown list.
-
Inbound: external traffic accessing the resource
-
Outbound: traffic from the resource accessing external destinations
Protocol
Select the network protocol for the rule, such as TCP, UDP, or ICMP, depending on the business requirement.
For example:
-
HTTP uses TCP
-
DNS may use UDP
Min Port and Max Port
Enter the port range for the rule. This supports:
-
a single port, where Min Port and Max Port are the same, such as
22 -
a port range, such as
80–8080
For some protocols, such as ICMP, ports may not be required. In that case, enter -1 or follow the platform prompt.
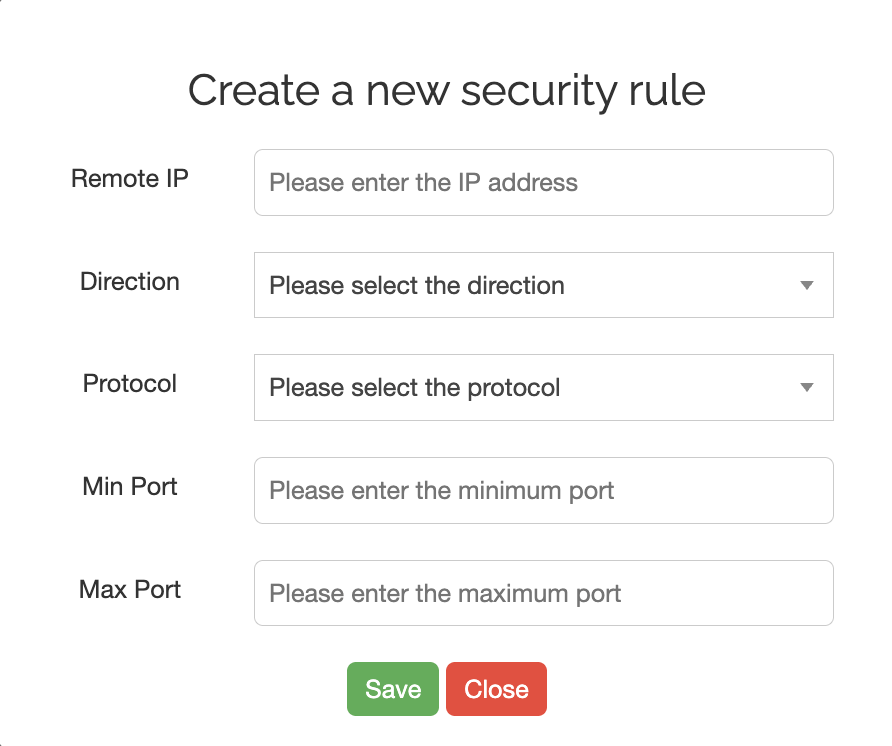
After completing the fields, click “Save” for the rule to take effect. Click “Close” to cancel.
(2) Edit / Delete Rules
In the Security Rule list, find the target rule.
Click “Edit” in the Operation column to modify the rule parameters, such as Remote IP, Direction, or ports.
Click “Delete” to remove the rule. Please note that deleting a rule may affect service access, so make sure to verify it in advance.
By properly using Security Groups and rule configurations, you can build a multi-layered network security framework, precisely control network access, and provide stronger protection for the stable operation of your services.
