
1. Overview
During the SSL certificate application process, Domain Control Validation (DCV) is required to verify your ownership or control of the domain. After the DCV is successfully completed, the SSL certificate is typically issued within about 30 minutes.
|
Validation Method |
Applicable Scenario |
Estimated Time |
|---|---|---|
|
Email Validation |
The domain email account can receive emails |
Within minutes |
|
DNS Validation |
You can manage the domain DNS records |
After DNS propagation takes effect |
|
HTTP/HTTPS Validation |
You can access the website root directory |
After the file is uploaded |
⚠️ Important: For email validation, the receiving email address must be either a domain-based email address or the domain registrant email address shown in the WHOIS record. All validation steps must be completed by the customer.
2. General Input Rules
2.1 Domain Format Requirements
When applying for an SSL certificate, the Domain information cannot be an IP address. It must be entered in domain format, such as xxx.xxx.xxx.
|
Certificate Type |
Domain Format |
Example |
|---|---|---|
|
Single Domain Certificate |
Enter the domain that needs to be bound directly |
|
|
Wildcard Certificate |
|
*.example.com |
|
Multi-Domain SAN Certificate |
Enter one primary domain only. Other domains can be entered when submitting the certificate |
2.2 Common Input Errors
Error 1: Entering an IP address
Issue: An error appears when clicking “Submit” after “Save”
Cause: SSL certificates can only be bound to domain names, not IP addresses
Solution: Change it to the correct domain format
Error 2: Entering a specific domain for a wildcard certificate
Issue: A format error is shown during submission
Cause: A wildcard certificate must use the *.domain.com format
Solution: Change it to the wildcard format
3. Email Validation
3.1 Steps
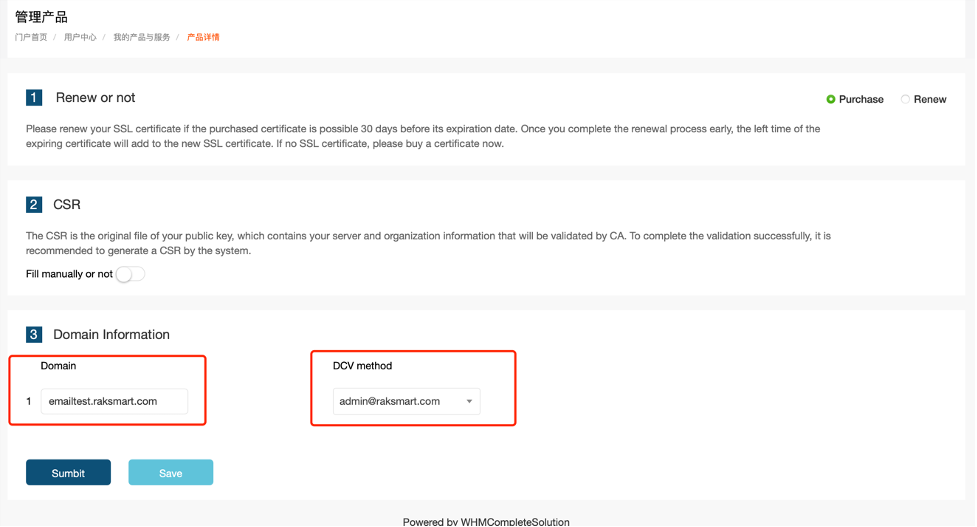
Step 1: Select the validation method
-
Enter the Domain information on the certificate application page
-
Select the “DCV method” as the email validation address
-
Click “Save”
-
Click “Submit”
Step 2: Confirm submission
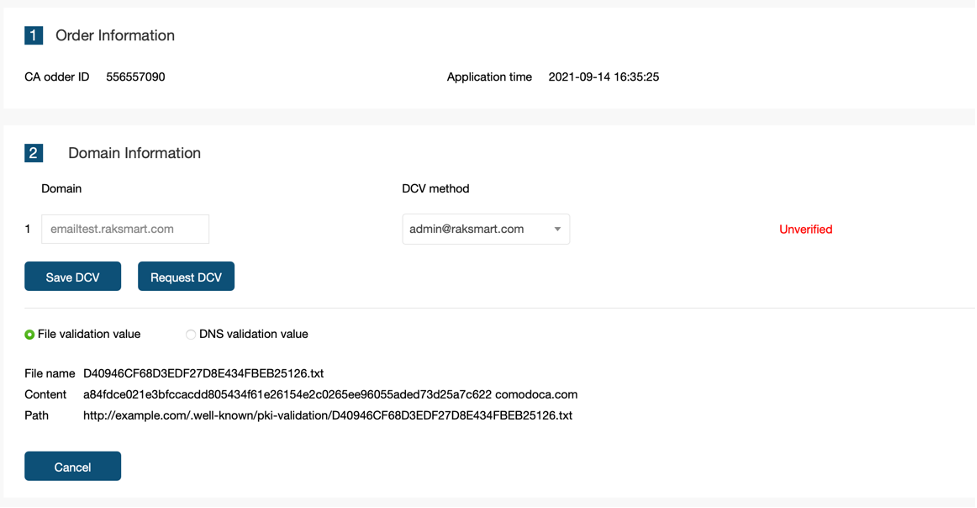
After the submission is successful, the page will jump to the confirmation page.
Step 3: Check the email and complete validation
-
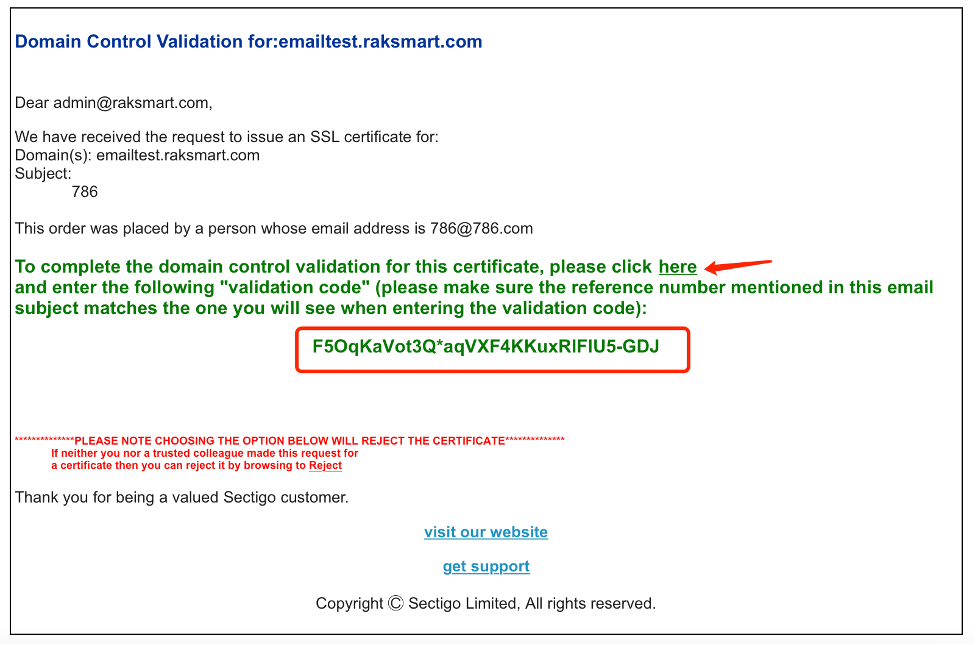
Log in to your mailbox and check the validation email sent by the certificate authority
-
The email will contain a verification code and a verification link
-
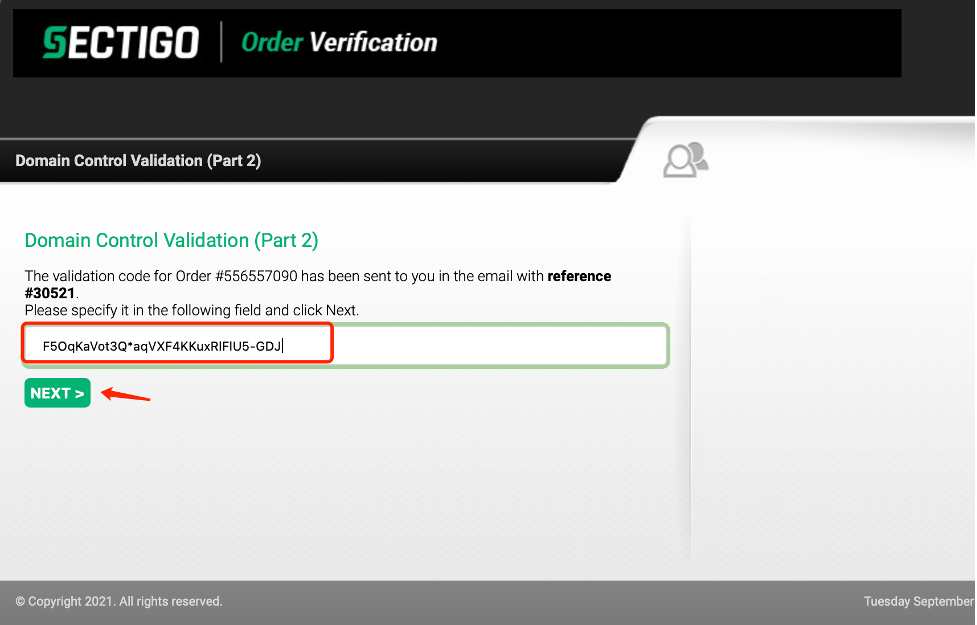
Click the “here” link in the email to open the verification page
-
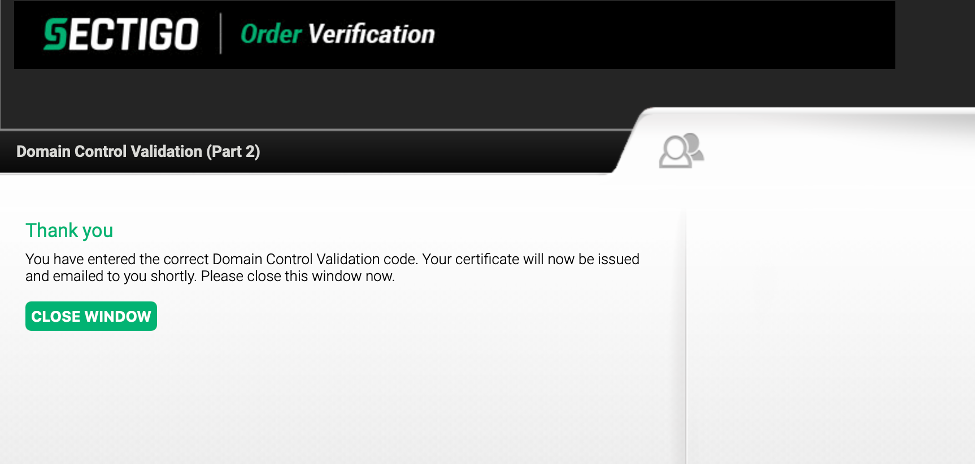
Enter the verification code from the email on the verification page
-
Click “Next” to complete the validation
3.2 Validation Completed
-
The page will display that the validation was successful
-
The certificate status will be updated to validated
4. DNS Validation
4.1 Steps
Step 1: Select the validation method
-
Enter the Domain information
-
Select the “DCV method” as “DNS validation”
-
Click “Save”
-
Click “Submit”
Step 2: Obtain the validation information
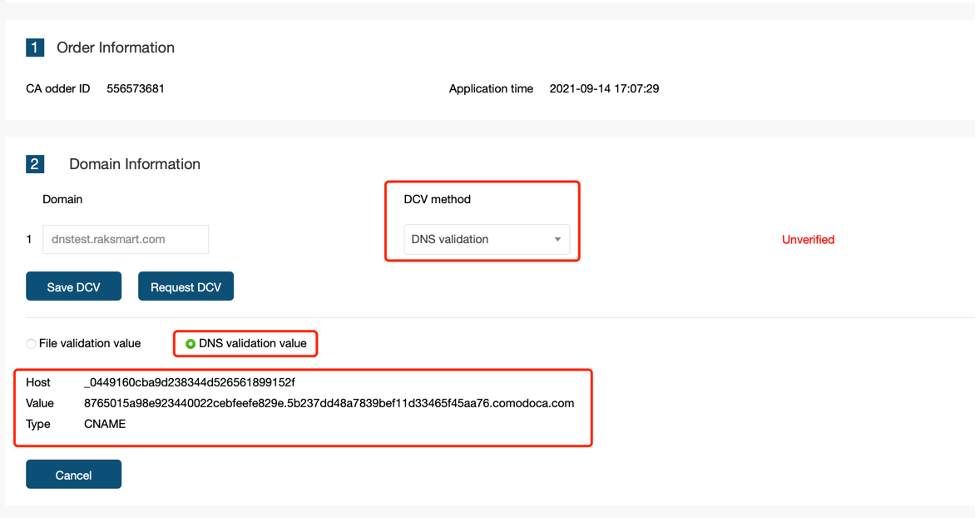
After submission, the system will generate a DNS validation record, including:
|
Field |
Description |
Example |
|---|---|---|
|
Host |
Host record |
|
|
Type |
Record type |
|
|
Value |
Record value |
|
Step 3: Add the record in DNS management
-
Log in to your domain DNS management panel
-
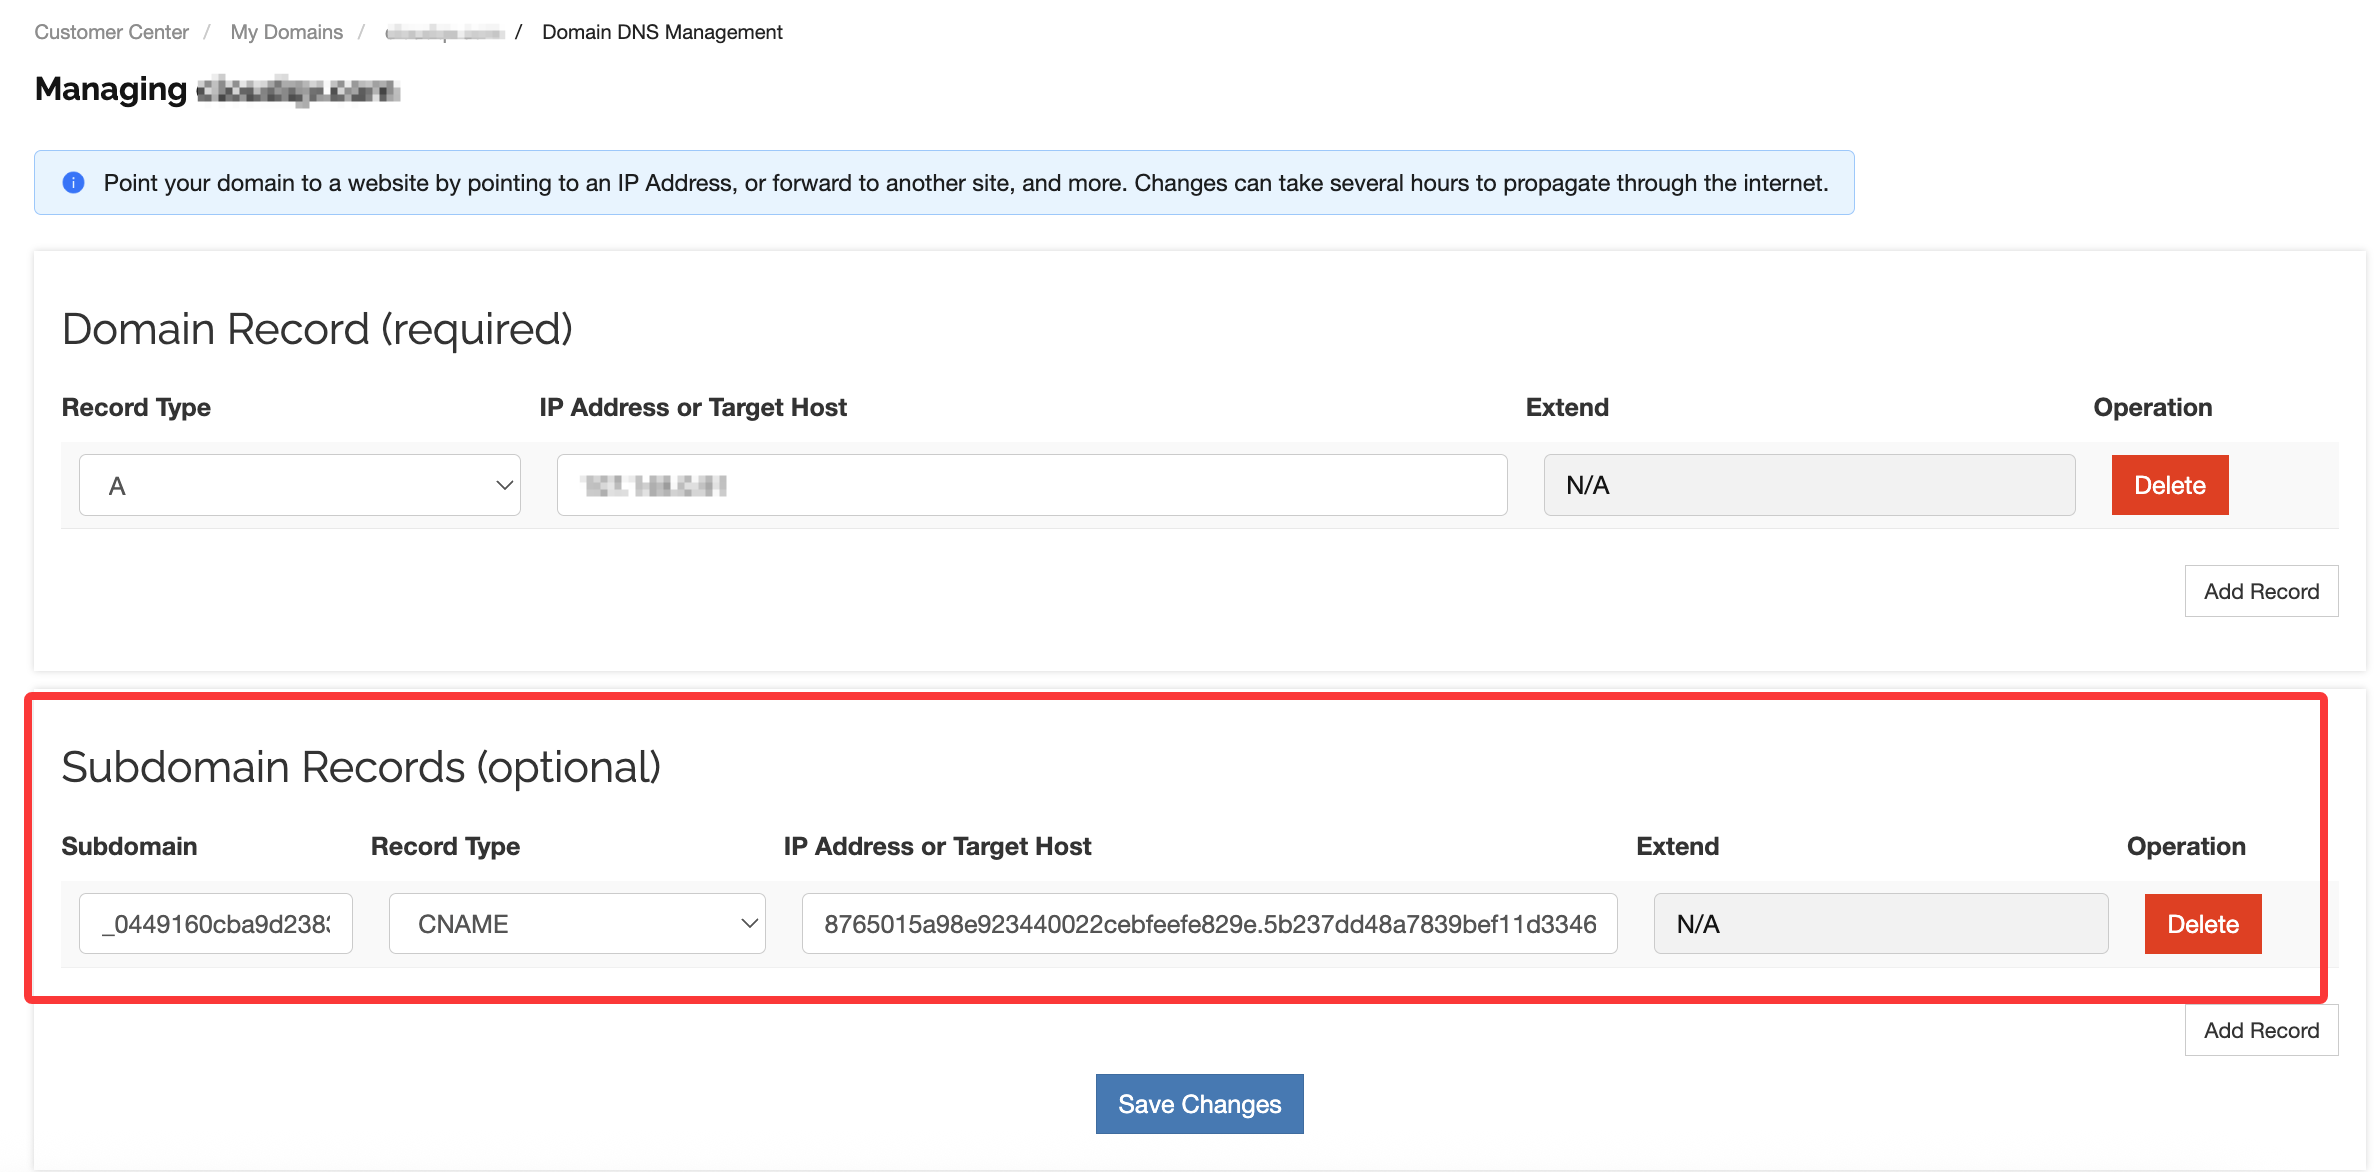
Find the domain that needs to be validated, and enter the validation value in the subdomain record section
-
Fill in the record according to the information provided by the system
Step 3.1: Verify that the DNS record has taken effect
After adding the DNS record, you can use a DNS lookup tool to check whether the record has taken effect.
Visit DNS Lookup / DNS Record Query , enter your domain and host record, and check the resolution status. If it shows that the record has taken effect, the system will automatically complete the certificate validation.
5. HTTP/HTTPS Validation
5.1 Steps
Step 1: Select the validation method
-
Enter the Domain information
-
Select the “DCV method” as “HTTP validation”
-
Click “Save”
-
Click “Submit”
Step 2: Obtain the validation file information
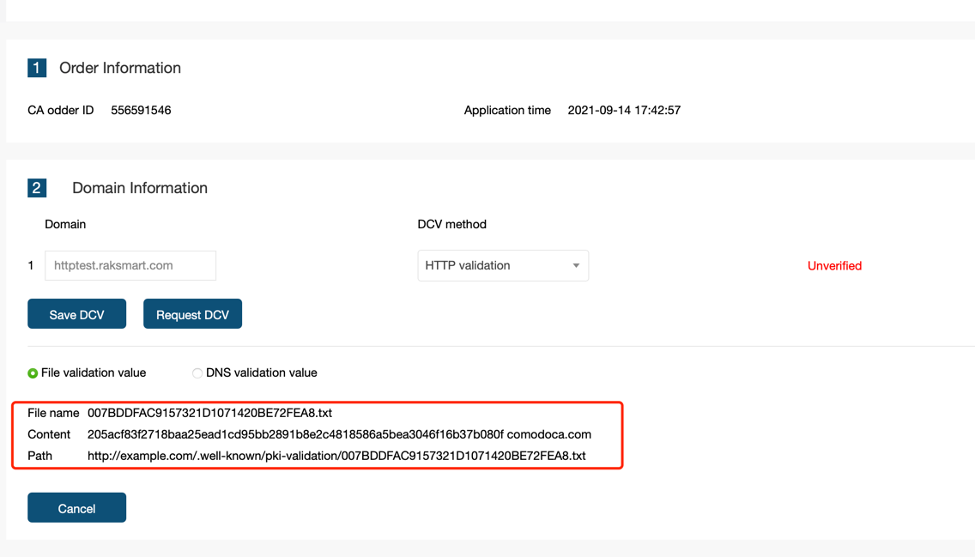
The system will generate a validation file that needs to be created in the website root directory:
|
Item |
Example |
|---|---|
|
File Path |
|
|
File Content |
verification code + CA domain |
|
Validation URL |
|
Step 3: Create the validation file in the website root directory
Example for Linux / Apache / Nginx environments:
# Enter the website root directory (adjust the path according to your actual environment)
“cd /var/www/html”
# Create the required directory
“mkdir -p .well-known/pki-validation”
# Enter the directory
“cd .well-known/pki-validation”
# Create the validation file and write the content echo "205acf83f2718baa25ead1cd95bb2891b8e2c4818586a5bea3046f16b37b080f comodoca.com" > 007BDDFAC9157321D1071420BE72FEA8.txt
# Set file permissions (make sure it is accessible)
“chmod 644 007BDDFAC9157321D1071420BE72FEA8.txt”
# Restart the web service (optional, to make the configuration take effect)
" /etc/init.d/apache2 restart”
# Or “systemctl restart nginx”
Windows / IIS environment:
-
Create a folder named
.well-knownin the website root directory -
Create a folder named
pki-validationinside.well-known -
Create a text file in the
pki-validationfolder, for example:007BDDFAC9157321D1071420BE72FEA8.txt -
Open the file with Notepad and paste the content provided by the system
-
Save the file
Step 4: Test whether the file can be accessed
Open the validation URL in a browser:
-
✅ Normal: the browser displays the file content
-
❌ Abnormal:
404 Not Foundor the file cannot be accessed
5.2 Validation Completed
After the file becomes accessible, the system will automatically detect it and complete the validation.
Certificate issuance time: After any of the above validation methods is completed, the SSL certificate is usually issued within about 30 minutes.
6. Frequently Asked Questions
6.1 What should I do if the certificate is still not issued after application?
If the certificate remains in “Pending” status for a long time, you can try the following:
-
Visit the certificate status check tool: Sectigo Order Status Checker
-
Select the purchased certificate order
-
On the DCV validation information page, locate the two validation configuration options
-
First change it to another option, then click “Save your changes”
-
Then change it back to the original option and click “Save your changes” again
-
If the configuration is correct, it will usually take effect immediately
6.2 What should I do if I entered incorrect information during the certificate application process?
Pending status:
The domain cannot be changed. You must wait until the certificate is issued, or cancel it and apply again.
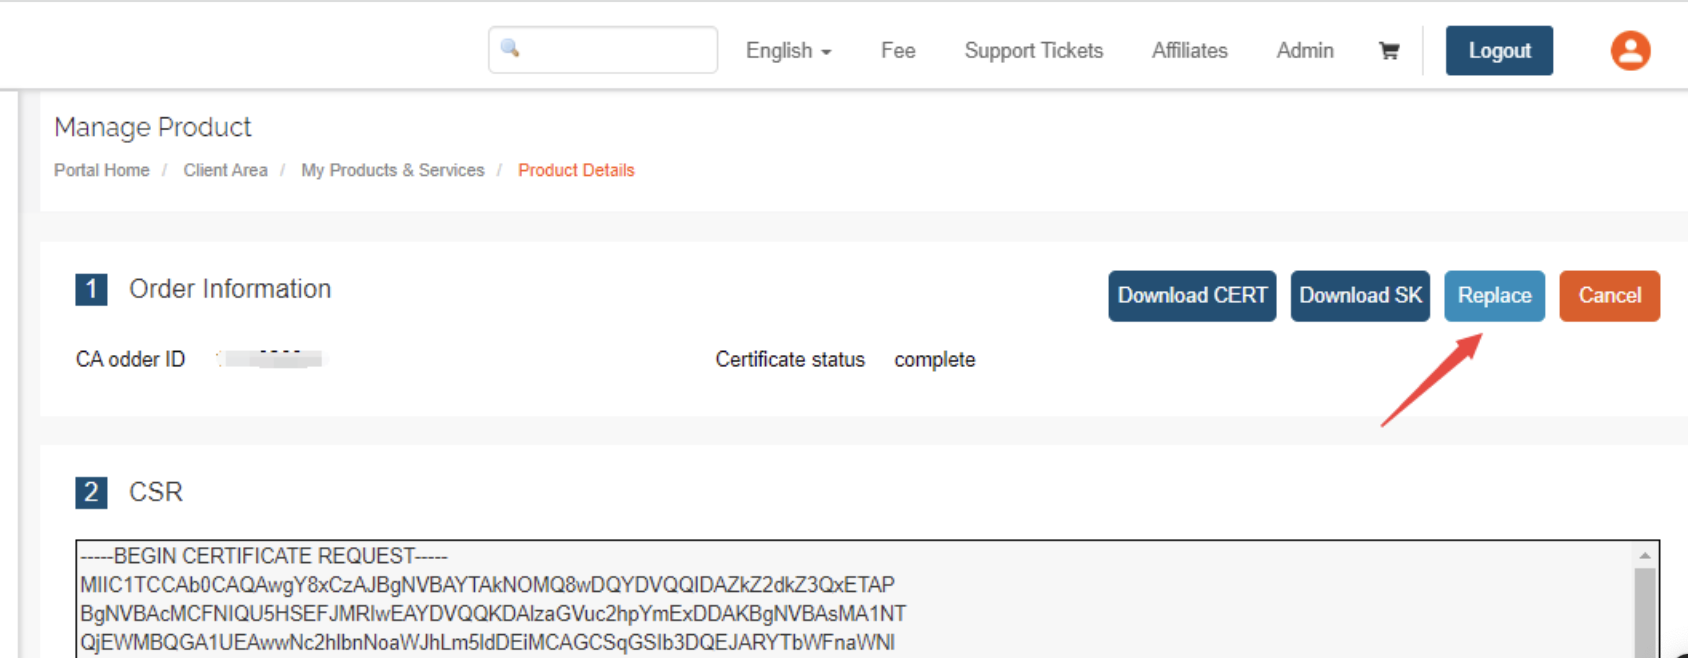
Issued status:
You can click “Replace” in the backend to change the domain.
6.3 What should I do if I accidentally clicked the Cancel button?
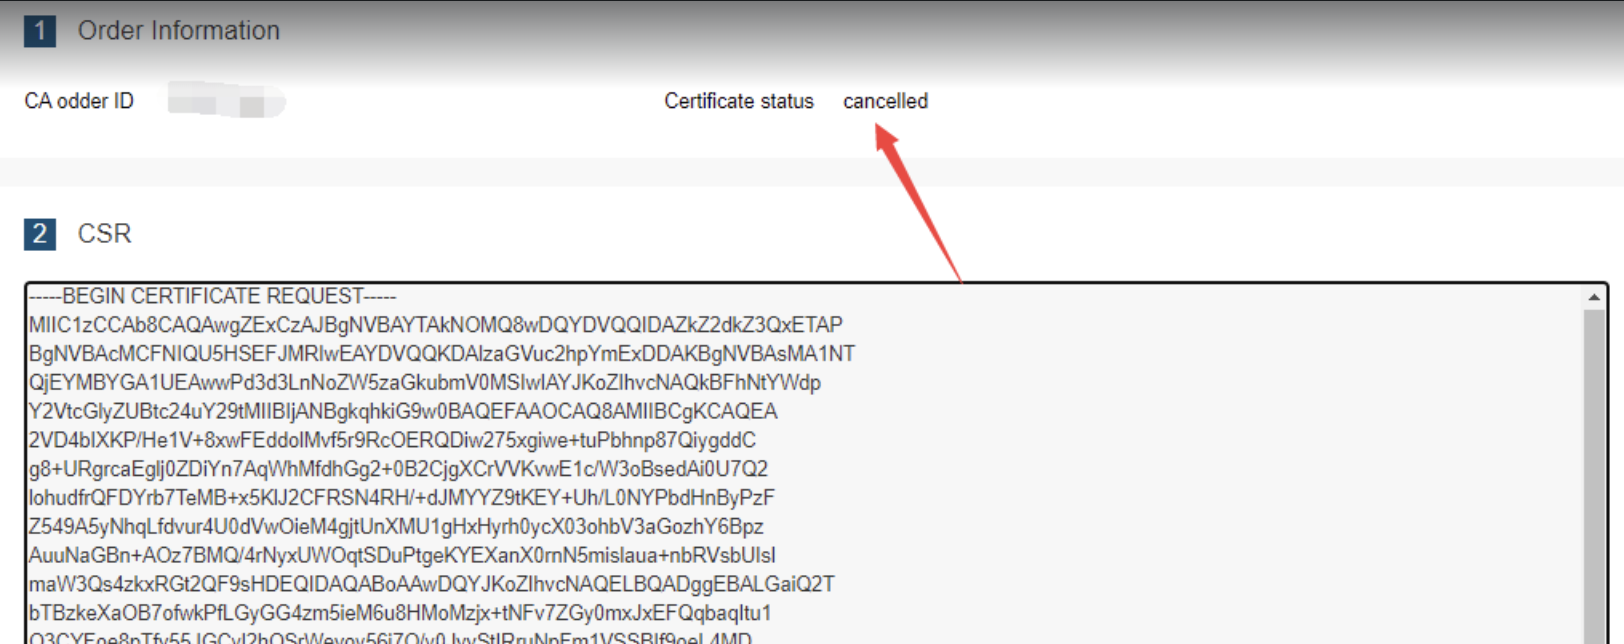
Cancelled status explanation:
-
A cancelled status cannot be restored
-
No further operations can be performed
-
You need to purchase the certificate again
7. Technical Support
If you encounter any validation issues, you can contact us in the following way:
Submit a ticket: Click “Submit Ticket” in the upper-right corner of the backend.